| This post may contain affiliate links. If you click on the links and buy, we get a commission. It doesn't cost you anything. See the full disclaimer here. |
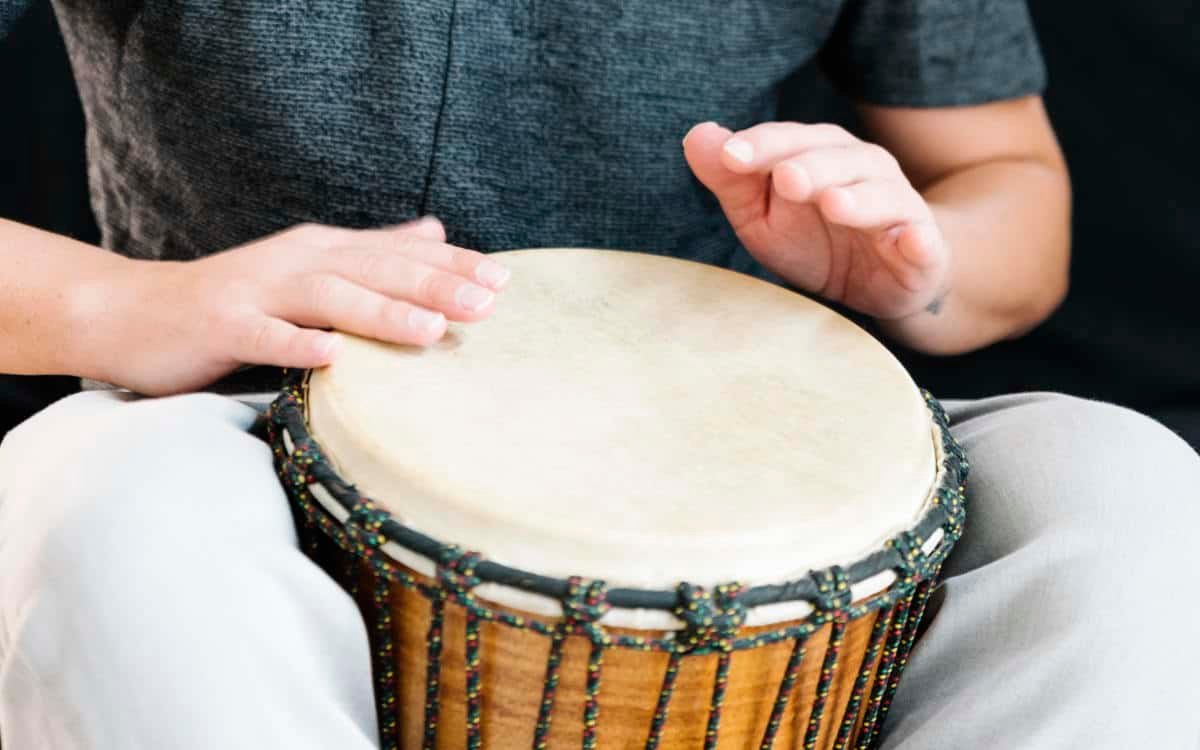
Djembe Reskinning: Complete Guide to Drum Repair
Everything you need to know about djembe reskinning is detailed here. This guide includes photos, diagrams and links to essential tools.
When Djembe Skins Break
Djembe skins can break during playing sessions. They can also tear while tuning the drum. Sometimes, these breaks even happen by themselves in the middle of the night with a loud crack.
However horrible these situations sound, reskinning is essential. Moreover, I believe every serious djembe player should complete this task at least once.
Why This Job Matters
Reskinning requires dedication because it involves hard work. Therefore, avoid starting this project an hour before a jam session. Instead, plan ahead and allow proper time.

Without a tensioning device, expect tough rope pulling. Also, threading can take its toll on your hands. Consequently, having someone to help makes the job easier.
For those with back problems, ask a burly friend to help. Similarly, anyone who doesn't feel up to the physical task should seek assistance.
Sira kelen sira te - "One way is no way at all" - Malinke saying.
Do it your own way. If you find a better method, please share!
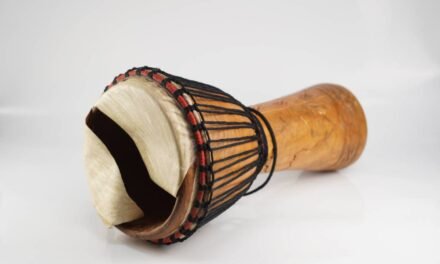
1. The components of a djembe
A standard hand-made djembe consists of four main parts:
- A wood shell
- Three metal rings (2 large, 1 small)
- Three lengths of rope
- A drum skin
Understanding the Ring System
Metal rings grip the skin in place over the wooden shell. Meanwhile, rope tightens the skin and makes the drum playable.


Ring 1: Large metal ring at the top with rope loops (red in diagram)
Ring 2: Large metal ring below this without rope loops (blue in diagram)
Ring 3: Small metal ring around the centre with rope loops (small red)
The Rope Setup
Three rope lengths serve different purposes. First, they create the basic structure. Then, they provide the tension needed for proper sound.
- Rope 1: Creates loops around Ring 1
- Rope 2: Forms loops around Ring 3
- Rope 3: Threads between Ring 1 and Ring 3
Each rope on metal rings uses a simple weave pattern. Furthermore, one piece of rope goes all the way around each ring.


BROKEN DJEMBE?
GET DRUMMING AGAIN QUICKLY AND EASILY!
Fix Your Djembe in 60 Minutes
Choosing the Right Skin
Animal skin is most commonly used, particularly goat skin. However, cow skin and antelope work well too. Additionally, man-made skins are available for those wanting other options.
When replacing a broken skin, several choices exist. Therefore, check the skin against light for flaws. A good skin should not shed hair too much.
For large drums (over 35cm across): Choose thicker skins (>1mm)
For smaller drums (30cm or less): Pick thinner skins (less than 1mm)
Thinner skins suit beginners and middle-level players. In contrast, thicker skins challenge advanced players but offer better lasting power.
The Wood Shell
The shell is usually carved from one piece of wood. They range in size depending on preference and several types of wood are used.
2. Timeline of the job
Djembe reskinning should span two or three days. This allows the skin time to set before full tightening.
First Attempt Timing
Allow about 3 hours for your first try. This includes fitting, stringing and tightening the skin. Then, add another hour the following day for retightening.
Important: Work outside or on a washable floor for best results.
Extra Prep Days
Two days before: Oil the drum (if wanted)
Day before: Allow wood to dry if oiled
Day 1 Schedule
- Getting the skin ready: 30-120 minutes soaking time
- Taking apart the djembe: 20 minutes
- Filing the shell: Extra step
- Fixing cracks: Extra step
- Oiling the shell: Extra step
- Cloth wrapping rings: Extra step
- Making hoops on rings: Extra step
- Putting together the djembe: 30 minutes
- Tightening verticals: 45 minutes
Day 2 Schedule
- Tightening verticals: 30 minutes
- The Mali weave: 30 minutes
3. Tools
For reskinning a large djembe, you will need basic household items plus special tools. First, gather the everyday items. Then, consider the extra tools that make the job easier.
Basic Items
- Large bucket
- String
- Matches or lighter
- Sharp knife
- Scissors
- Pliers
- Hammer
- Short thick stick (14" long - broom handle section works well)
- Felt-tip pen
Extra Professional Tools
- Heavy, medium and light sandpaper
- Rubber tennis racket grip (3m/10")
- Clamcleat puller
- Djembe drum rope puller bar tool
- Rasp/file
- Linseed oil or shea butter
- Plain candle wax
- Razor blade (for skins with hair)
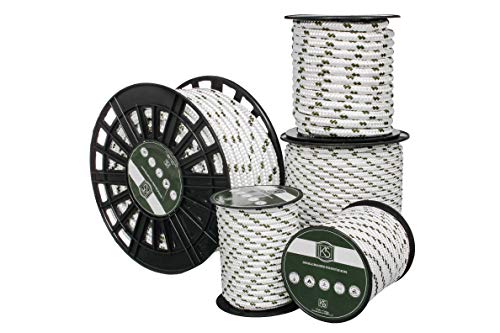
4. Rope
If your rope is frayed or has snapped in places, it's best to replace it.
Therefore, understanding rope types helps you choose correctly.
Braided Cord Types
Djembes typically use braided cord made from several fibres. Sometimes, manufacturers include internal rope for added strength.
Materials: Pre-stretched nylon, polyester or polypropylene
Diameter: 4-6mm (3/16") for solid core/internal braid cord
Flat rope: 3mm flat rope (no internal braid) appears on many African djembes
Strength Requirements
For full-size djembes, breaking strength should be 500 lbs minimum. However, tightly tuned djembes need 800 lbs and up for safety.
Length Calculations
Complete rope replacement: 80 ft (25 metres) for large djembes
Verticals only: 66 ft (20 metres)
Loops only: 16 ft (5 metres)
Recommended Rope Options
Premium choices:
- 5mm or 6mm nylon braided cord with inner core
- 5mm or 6mm polypropylene/polyester braided cord with inner core
Budget alternatives:
3. 550 Paracord Type III (3.8mm) - smaller drums (<10")
4. 750 Paracord Type IV (4.2mm) - larger drums (>10")
5. Links to Buy Tools
Here's a selection of the best djembe ropes on Amazon for various budgets and color choices.
New Rope


New drum skin
You can choose to either have skin with hair, or skin without. If you are doing this for the first time, I would recommend skin without hair. It will save you time and effort when reskinning, but you will not have the option to have a fur collar around your drum.
Here are a few of the best djembe skins on Amazon.
Hairless (for beginners I would recommend the one on the left):


With hair:


Clamcleat puller
This small device is for gripping the rope and allowing you to pull on it without giving you blisters on your hands! Well worth it.

Djembe Drum Rope Puller Bar Tool
This is a device for pulling the ropes to tighten the drum. It replaces the short stick above. This one is quite expensive, but if you're going to be reskinning more than one drum in your life, it's a great investment.

Rubber tennis racket grip - approx 3m/ 10" (optional)
This is used for adding grip to the rings, so that the rope does not slip.


You could also use a 3m strip of cotton cloth about 5cm wide.
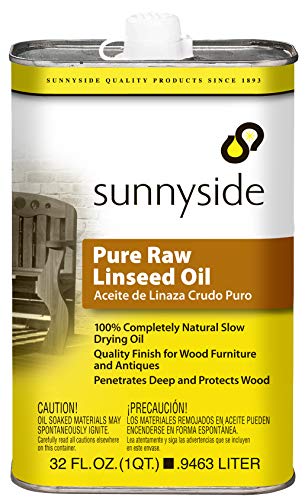
Linseed oil or shea butter (optional)
Some people suggest shea butter, altough I would go for linseed oil,but avoid boiled linseed oil. This is the good stuff. This product is actually for cricket bats, but will do fine on a drum.
Razor blades
These are the ones:

6. Preparation
Preparing The Skin - do this ideally 2 hours before you start

Start this process ideally 2 hours before beginning assembly. Bend and fold the skin carefully to fit into a bucket of tap water. Ensure complete submersion without cracking the playing area.
Soak the skin for 2 hours minimum. Longer soaking creates more pliable skin and easier hair removal. Some people leave skins for 2 days, although longer periods become unnecessary and smelly.
Dismantling Your Djembe
For damaged skins, simply cut or tear them off. Use a hammer to tap rings loose if necessary. Once rings loosen, vertical binding becomes easy to undo.
Undamaged skins can transfer to another drum. Therefore, undo verticals carefully without tearing the skin.
Rope Inspection
Replace rope every time you reskin for best results. However, if reusing old rope, check it carefully. Using rope frayed more than ¾ of original width risks future problems.
Then check rope loops on metal rings for fraying. Similarly, inspect rings themselves for damage and arrange repairs if necessary.
Any metal workshop can cut, turn and weld replacement steel rods.
Shell Maintenance
Filing the shell (optional): The outside edge should have a smooth curved profile. Sharp or angular edges cause painful playing experiences. Use a rasp to file, then sandpaper to create a nice rounded edge.
Note: Keep the inner edge sharp - only round the outer edge and sand off sharp points.
Repairing cracks (optional): Small cracks respond well to coarse sawdust and wood glue mixture. However, larger cracks present long-term problems and may prove irreparable.
Oiling the shell (optional): This process takes extra days but keeps wood hydrated and beautiful. Brush the entire shell with raw linseed oil using an old paintbrush. Allow several days for complete absorption.
7. Making loops in the metal rings
Note: This step only applies if existing rope is old or frayed. Otherwise, proceed to making the drum head.
Remove existing rope and any cloth or grip underneath. These strips allow better rope grip on the ring. Replace using rubber grip or long cloth strips.
Wind the material around the ring and tie off loose ends securely.
Creating Top Ring Loops
The rope loops use a series of cow hitches (knots). Follow these steps:

The loops in the bottom ring need to be done with the metal ring still around the waist (it usually isn't meant to come off, but some do) , which makes it a bit more tricky.

How to make the loops on the large (top) ring


Important: Make identical numbers of loops in top and bottom rings. Stay within 22-30 limits for regular-sized drums.

It should now look like this:
Creating Bottom Ring Loops
Bottom ring loops mirror top ring loops. However, the process becomes trickier because the ring usually stays around the drum's waist.
Follow the same cow hitch pattern but work around the drum body. Remember to maintain the same loop count as the top ring.
Step 1: Remove the old rope completely. Starting at one end of the rope, thread it around the ring as shown.

Step 2: Thread another loop as shown.

Step 3: Tighten the knot and repeat the process, slowly working your way around the ring.

When you reach the other end of the rope, tie the two ends to each other using the reef knot.
8. Making the drum head
Stretching and Cleaning

This messy stage requires old clothes and outdoor workspace. Remove the skin from water and examine the slimy side for loose skin or fat. Remove debris with a knife.
Stretch the skin by standing on one end and pulling the other. Try to stretch all sides evenly for best results.
Take the large metal ring without loops and tie a small string marker at one place. This marker proves helpful later during alignment.
Making The Drum Head

- Position: Lay skin hair-side up on a clean flat surface
- Centre: Place the large unbraided ring in the centre
- Align: Position the ring so the spine (darker, denser hair) runs down the centre with string marker at top
- Trim: Remove excess skin, leaving 15cm borders on all sides
- Fold: Fold edges into the ring centre, creating a dim sum shape
- Secure: Make 10-15 incisions in excess skin and lace with string


Ring Alignment
Place the drumhead on the shell rim, aligning the string with your wood mark. Check that the drumhead centres on the rim and place the braided ring on top.
Neither the djembe nor rings may be perfectly round. Therefore, hold the ring over the djembe and rotate if necessary for the best fit. Position them centred with equal distances all around.
Take the large ring with loops and lay it over the drum head. Align carefully so rings line up with each other and centre over the drum shell.

From the top:

Aligning the rings - view from the top
9. Threading the verticals
Use a length of rope to thread loosely between top and bottom loops around the entire drum. This creates what we call "verticals."

Threading Process
- Start: Thread rope between the first two loops as shown
- Secure: Make a bowline noose with the left-hand piece
- Continue: Thread the right-hand piece through a bottom ring loop and up through the next
- Complete: Thread back up through the top ring - up through the same loop and down the next
- Finish: Continue around the drum without tensioning the skin

2. Take the left hand piece and make a bowline noose as follows.

3. Take the right hand piece and thread through a loop in the bottom ring and up through the next one.

4. Thread back up through the top ring again - up through the same loop as you came and down the next.

Continue this way and thread the entire drum without putting any tension on the skin. If you don't get all the way around, don't worry.

Initial Tightening
Starting at your original knot, gently tighten by working around the verticals. Take up a little slack on each vertical. When reaching the rope end, tie it off and start again.
Repeat this process at least twice, getting progressively tighter each round. Avoid pulling rings out of alignment to prevent skewed drum heads.
Make it tight enough to hold rings in place for the next step, but not incredibly tight yet.

7. Turn the drum upside down, resting it on a covered surface.

Final Tensioning
Turn the drum upside down on a covered surface. Starting where your noose is, work around the drum pulling tighter on each vertical.
The upside-down position provides better leverage for this demanding task. When returning to the beginning, tie off on the noose.
Complete as much tightening as possible while the skin remains wet. At some point, cut the string holding loose skin edges together on the drum face. This may allow further skin tightening.
Keep the drum upside down during tightening to maintain ring alignment. Finally, tie off the rope and turn the djembe right way up.

You're done with threading the verticals! There is more tightening to be done later, but we'll get there.
10. Trimming the skin
When your drum is upright, fold excess skin back over the sides. Finally, it's starting to resemble a proper drum!
Trimming Options
Choose between two approaches for handling excess skin:
Option 1: CollarAllow excess skin to flop over the sides, creating a collar covering rings and rope loops. Fold skin out over rings and trim just below the top of rope loops before drying. Use rope or string to hold skin down over rings and cut excess below the rope.

Option 2: No Collar
For a clean-cut appearance without much hair or fur, cut excess skin with scissors close to rings. Leave rings visible but don't cut too close so skin slips out. Maintain about half an inch (1-2cm) of skin sticking out - short enough not to interfere with playing.

11. Removing The hair from the drum head (only for skins with fur)
Note: This section applies only to skins with fur.
For optimal drum head resonance, remove as much fur as possible from the playing surface. Traditional methods work best, though some people experiment with alternative approaches.
Traditional Shaving Method
Shave hair on the drum face using a razor blade. This process can be slow and requires extreme care to avoid nicks. Work when the drum is tight and skin is dry for best results.
- Hold: Grip the razor blade between thumb and forefingers, bending it slightly
- Position: Hold the blade at 90 degrees to the skin
- Shave: Work with the grain of the hair using steady pressure
- Finish: Use light, smooth sandpaper to remove stubble and dirt

Hold the razor blade at a 90 degree angle to the skin and shave with the grain of the hair.

Final Smoothing
Work carefully and lightly to remove all hair on the face and edges. Take time to eliminate all dirt and hair without scratching the skin. Sand lightly around the rim until the whole face and edges feel smooth and clean.
Congratulations! The first part is complete. However, the challenging job of djembe tuning still awaits, so when you're ready, continue to our Djembe Tuning guide.


Thank you
Superb and extremely well done. Many, many thanks!
Im stuck here please cause its not clear-as I have a hairless skin soaking, and do I need to step on it to STRETCH IT BEFORE PUTTING IT ON THE RING? (just like he did above with the haired one?) Also where am I to make a mark on the drum? skins been soaking about 4 hours now! maybe ill take it out and wait idk please help!
Hi,
Yes you can stretch a hairless skin too – either with hair or not is fine to stretch. You can make the mark on the drum anywhere you like really, it just has to line up with the mark that you make on the ring. This is only necessary if the drum is not perfectly round, as the ring won’t be perfectly round either, so you’re trying to line them up nicely so the ring will fit snugly on the drum.
Hope that helps!
Al
I just finished my first re-skinning! I was given a djembe with a torn skin because they didn’t want get it fixed or do it themselves. I got a goatskin with hair, and set out. I am happy with the results. I made some rookie mistake and it probably won’t last as long as it should, but it sounds great! I have a couple questions, but first what I learned…
First, when I folded the skin over the ring, I probably folded it too tight. Once I untied it and folded it over the outer ring, I could see it was off-center. My first folds probably moved the ring and I didn’t check it carefully before tying it up. If I had, I probably could have re-centered it without too much trouble. I don’t know how this will effect the sound or life to the skin. It is about 2 cm off center.
Second, I trimmed too much off from around the edges. I wanted a collar, but in several parts, I didn’t leave enough skin to cover the top knots. In one spot the outer ring is visible. I really like the look of the collar covering the knots and how it shrinks to be pressed against the verticals. After putting the skin on and tying loose verticals, I trimmed it to cover the top portion of the knots and left the hair on. It looks okay, but not how I really wanted it. I tied the collar differently because it was so short. I crisscrossed back and forth over the head in a star pattern. Wrapping the rope around the head, it would slip down before reaching collar due to the taper of the body. I made sure the the collar was flat under the star pattern. After sitting overnight, I took that off. I could feel it was starting to firm up. I wrapped around the edge again, except the first wrap, I put as close the edge of the skin as possible and knot it to the vertical. So the first wrap kind of followed the edge of the collar. I used these knots to prevent the rope from slipping on the following wraps . I didn’t need as many wraps to close the gap to the shortest parts of the collar.
Third, I got a little impatient removing the hair. I used a stiff, single edge blade in a handle instead of a loose double edge blade. It was efficient at removing the hair, but I did nick it a few times. I also tried to go over the corner at the edge using the razor and nicked it there too. When I got to sanding it, I found the sand paper did a good job removing the hair and I probably didn’t need to take off as much as I did with the razor. And I should have used only the sandpaper on the sides. Fortunately, the nicks did not cut all the way through and I was able to mostly sand them out. I could get them all out and the skin it thinner in those spots, I’m sure it will wear and age more quickly. But now I know for next time.
Now my questions. 1) How smooth should the skin be? As I sand it, it feels very smooth. But after I wipe the dust off, I can feel stubble, particularly going against the grain. If I wipe against the grain with a paper towel, it will leave some shreds behind. So far it doesn’t really bother me when I’m playing.
2) How straight should the rings be? I can see they are a little lower on one side. I have not done the Mali weave yet and I can probably adjust the tension to straighten the rings. Is that really necessary? The difference between the lowest and highest points is probably less than a cm or two. Can I use the weave to balance it?
3) How tight should I make the verticals before doing the weave? Is it okay to skip the weave? It has nice ring to it, and I have to push pretty hard to deflect the skin at the center of the head. How much, if at all, should I be able to deflect it?
On to the next step: learning how to play it!
Cheers!
Hi,
That’s a good tip to get a cheap djembe – a lot of people have broken djembes lying around gathering dust.
Re your points:
1. If the skin is off center, it shouldn’t affect the sound, it’s more of a visual thing. You could maybe try and pull it a bit more to the center before you tighten the rings too much if it bugs you.
2. i agree, I prefer the look of the skin over the rings but it can be tricky to cut it right. Your weaving sounds interesting, but I’m not sure if I understood it completely.
3. A few nicks on the skin are ok as I said, and yes, the shaving is a long and boring task. You’re probably right about the sandpaper, it might be quicker to go straight to that. I’ve just seen the pros do it with a razor in no time at all.
Your questions:
1. I don’t think the skin needs to be too smooth. It will wear over time as you play it. That stubble will stay there for a while until it has been played in. The vibrations will also help to loosen the stubble, and it will eventually come off. If the stubble is say, more that ‘a few days growth’, I would work to reduce it s bit more. That’s where the razor is better – it takes the hair off completely.
2. The rings may be off slightly, it happens and there’s not much you can do about it. Once the skin has dried there is no way to straighten them unless you take the whole skin off. Less that a cm or two is not bad, I would live with that. The weave won’t really balance it, but if the skin is still wet you may be able to use a mallet and block of rubber (or something that won’t tear the skin) to tap the higher side down a bit).
3. How tight to make the verticals before doing the weave? I would say if you can pull the vertical more than 5 or 6 inches from the body (using a stick) then you should go around again and tighten. If it’s less that than, you’re probably ready to start the weave. Good question!
Hope that all helps,
Regards
Al
AI – Thank you for your response. It is very helpful. I let this slip off my screen, trying to finish a long term project, building a guitar.
To clarify how I tied down the collar…
The star pattern: I tied the end of a parachord to a verticle just under the ring. Then I ran it over the head, to a verticle directly across, so it crosses over the head near the center. Then I went around head 2-3 verticals and tied it again. Then back over the head crossing at center again. Now it looks like a (round) pizza after the 1st two cuts. More over another 2-3 verts, knot, cross over center of the head, repeat. When it’s finished it looks like a (still round) that’s been cut into thin slices.
The wrapping: I tried a parachord to a verticle, just under the edge of the collar at the point where it is widest/lowest. Then I went around the drum 5-6 verticles and tied another knot. I continued, knotting every 5-6 verts, until I’d gone around the drum once. I start the next wrap above that 1st wrap. Because the body of the drum narrows as we go down, the wraps will tend to slip down. The knots in the 1st wrap will prevent subsequent wraps slipping down. From this point, I continue wrapping, sprialing up towards the top of the drum. When the sides of the collar are covered, I end the wrapping by tying to the previous wrap.
Pictures would help, but I didn’t take any at the time. I’ll re-do it and add pictures in another message.